Archive for August, 2010
Pressure mapping with DIY foam load cells
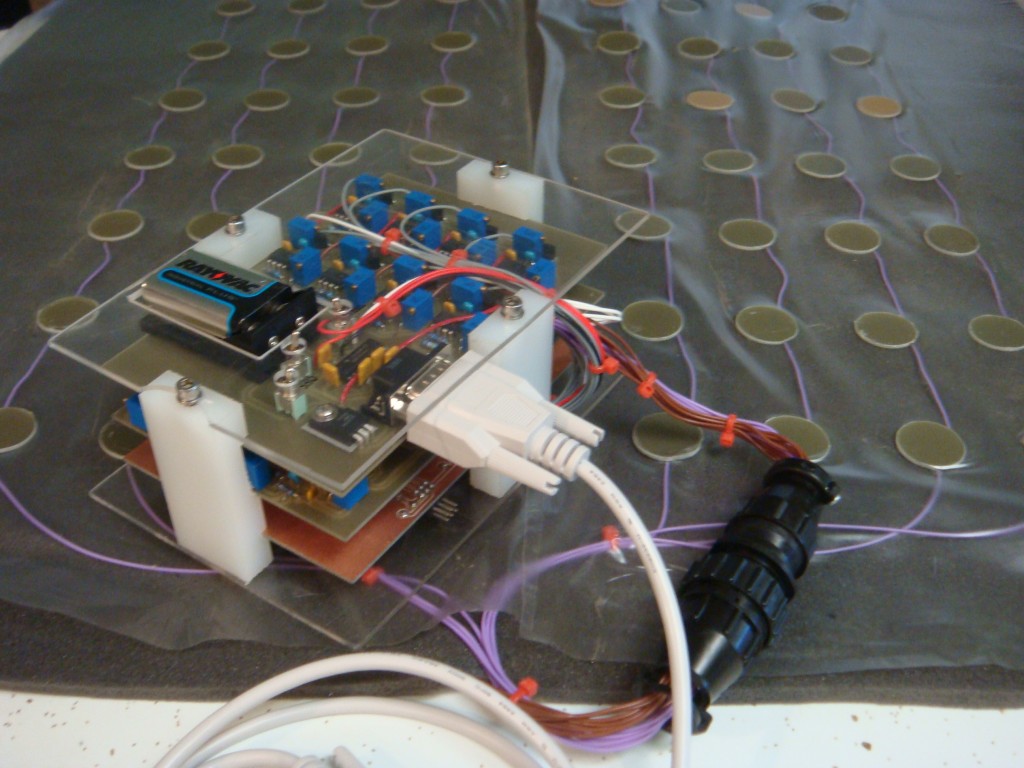
I had an idea a while back to make a pressure sensing pad for testing saddle fit on horses. The intent was to create an array of pressure sensing cells, which could then be used to produce a pressure map that would represent any pinch points on a horse’s back. I found that you can buy this sort of thing, but it’s way too expensive for the average guy. I decided to try and make my own for cheap. I ended up making one from a handful of copper-clad PCBs and 1/4″ shipping foam.

The active area of the pad is approximately 2′ x 2′. I think the foam is polyurethane open-cell foam but I’m not sure. It’s the stuff you use to pack shipping crates. The load cells are made by sandwiching the foam in between 1″ circle cutouts of copper-clad FR4 PC board. I used single sided board and a hole saw with the pilot bit removed (use a drill press and a clamp). The capacitance varies as the foam compresses, and the amount of capacitance is directly related to the thickness and density of the foam, as well as the area of the copper conductors (plates). So you can create any size or thickness load cell you want really. A bigger plate results in more capacitance, as does placing the plates closer together. I estimated the capacitance I would have in my application with this calculator I found at Daycounter engineering services.
I created an array of 64 cells by making 8 rows and 8 columns, each with 8 copper-clad discs. Wherever the row/column discs align a load cell is created. An AVR typically has eight available ADC inputs along with another eight control outputs, so this way you can scan down through the rows and columns to measure each cell. A square wave is sequentially output on the columns, and after some analog proccessing the AVR’s ADC scans each row. The analog voltage present represents the amount of pressure (capacitance) at each site. › Continue reading
Other Stuff
Recent Posts
- 6CY7 dual triode valve amplifier
- Air quality sensor (TVOC and eqCO2)
- Automotive rear fill “surround sound” with Boss DD-3
- Spring tester / weight scale
- Ducati 749/999 Tail Light
- Instruments for the GSXR
- Light pipe tail light for the GSXR
- M17x 6990m / 6970m overheating
- PAR / Spectrum analyzer
- Acrylic polishing and scratch removal
Archives
- May 2019 (2)
- April 2017 (3)
- October 2015 (1)
- May 2015 (1)
- March 2014 (2)
- December 2013 (1)
- July 2013 (1)
- November 2012 (1)
- October 2012 (4)
- September 2012 (1)
- August 2012 (3)
- June 2012 (1)
- March 2012 (1)
- February 2012 (1)
- January 2012 (1)
- October 2011 (3)
- July 2011 (1)
- June 2011 (3)
- May 2011 (2)
- April 2011 (1)
- December 2010 (1)
- August 2010 (1)
- July 2010 (3)
- April 2010 (2)
- March 2010 (2)
- January 2010 (2)
- December 2009 (2)
- October 2009 (2)
- September 2009 (1)
- August 2009 (15)